
Learning how to remove mold from washing machine components is essential for maintaining fresh laundry and extending appliance lifespan in Dubai’s humid climate. Simply wiping down the visible door glass does virtually nothing to eliminate deep-seated fungal growth. In reality, mold and bacterial biofilm establish themselves across three high-moisture zones at the same time: deep inside the rubber door gasket folds, throughout the detergent dispenser drawer channels, and along the inaccessible outer drum walls.
Permanently breaking this cycle requires a structured decontamination strategy executed in the precise chronological order that delivers the most effective results. This comprehensive guide walks you through the entire cleaning process step by step, outlines practical solutions for when mold stubbornly returns despite regular upkeep, and objectively compares which cleaning products are truly worth using to break down limescale, detergent sludge, and fungal roots. Tackling all five primary cleaning steps in a single, dedicated session rather than addressing them separately over time is the single most reliable way to neutralize active mold at the source and restore lasting, biological freshness to your entire laundry system.
How to Remove Mold From Washing Machine: Quick Overview
For anyone who wants the short version before diving into the full process: to remove mold from a washing machine effectively, every high moisture zone needs attention in the same session, not just the visible parts. That means the door seal folds, the detergent drawer and its housing, the drum interior via a hot cleaning cycle, and the drain filter, each cleaned in that order, followed by a full drying-out period with the door left open.
Skipping any one of these zones is the single most common reason mold returns within days of a “successful” clean. The five detailed steps below walk through exactly how to do each part properly, along with what to do if mold keeps coming back despite following this process.
Why Mold Keeps Coming Back Even After Cleaning
Before getting into the steps, it’s worth understanding why this is such a recurring issue rather than a one time fix. Mold needs three things to grow: moisture, warmth, and a food source, and a washing machine provides all three by design. The door seal traps water after every wash, the machine’s internal temperature during and after hot cycles creates warmth, and detergent residue plus fabric fibers provide the organic material mold feeds on.
This means a single deep clean, even done thoroughly, only resets the machine to a mold-free state, it doesn’t change the underlying conditions that let mold grow in the first place. That’s why the “How Often to Repeat This Process” section at the end of this guide matters as much as the cleaning steps themselves, ongoing prevention is what actually keeps mold from returning, not a one-time clean.
What You’ll Need Before Starting
- White vinegar or a washing machine cleaner product
- An old toothbrush or small soft brush
- A microfiber cloth or old towel
- Rubber gloves (optional, for heavier mold buildup)
- A shallow tray or old towel for the drain filter step
Choosing the Right Cleaning Product
| Product | Best For | Important Notes |
| White Vinegar | Regular monthly maintenance, mild odors | Inexpensive, natural, and safe for regular use. |
| Commercial Cleaner / Descaler | Moderate to heavy buildup, hard water areas | Contains descaling agents essential for breaking down Dubai’s mineral scale. |
| Baking Soda Paste | Spot-treating stubborn black mold on rubber seals | Lifts stains effectively without scratching or degrading rubber gaskets. |
| Diluted Bleach | Severe, deeply rooted mold outbreaks | Use only for severe cases. Never mix with vinegar (produces toxic chlorine gas). |
For most households doing this monthly, white vinegar or a commercial washing machine cleaner is enough. Diluted bleach is worth reserving for mold that hasn’t responded to a few rounds of regular cleaning, covered further in the stubborn mold section below.
Step 1: Clean the Door Seal Thoroughly
Estimated Time: 15 to 20 minutes
The flexible rubber bellows around the door opening is the primary incubator for mold in any front-load machine. The deep accordion folds are designed to absorb drum vibration and prevent leaks, but they naturally capture pooling water, stray fabric threads, hair, and slimy detergent residue after every spin cycle. Over time, these folds accumulate stagnant water that never dries, allowing black mold colonies to root deeply into the porous rubber surface.
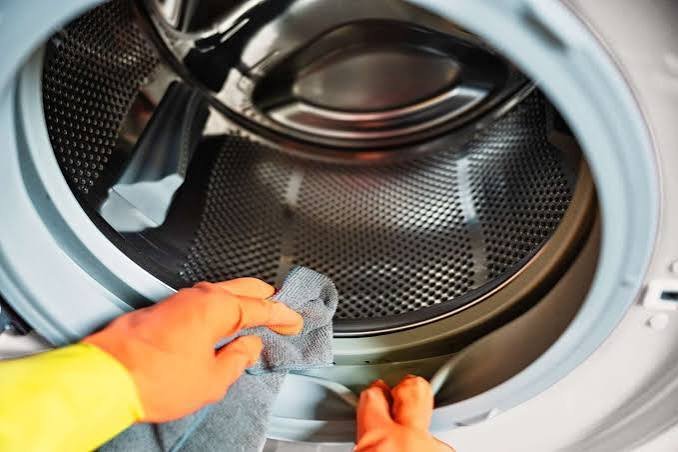
Begin by manually peeling back the rubber folds along the entire circumference of the door, paying special attention to the bottom section where water pools most heavily. Saturate a microfiber cloth with a solution of equal parts warm water and distilled white vinegar, then methodically wipe out the inner channels from top to bottom.Rotate the cloth frequently to lift and discard the fungal grime rather than spreading spores along the seal. For stubborn black mold stains that have embedded into the rubber, mix three tablespoons of baking soda with just enough water to create a thick paste. Work this paste into the stained areas using an old soft-bristled toothbrush, let it sit for fifteen minutes to penetrate the fungus, and then scrub firmly before wiping the entire gasket clean with a damp towel. While cleaning, inspect the small drainage holes at the base of the rubber seal to ensure they are completely clear of lint and hair so future rinse water can drain freely back into the tub.
Step 2: Deep Clean the Detergent Drawer
Estimated Time: 20 to 25 minutes (including soaking time)
Liquid detergents and viscous fabric softeners rarely flush out of the dispenser assembly completely. Over weeks of daily washing, chemical residue settles into the bottom of the drawer compartments and siphon caps, fermenting into a foul, jelly-like sludge. Furthermore, warm steam generated during hot wash cycles rises into the dark, enclosed drawer housing cavity, creating a heavy layer of black mildew across the internal ceiling and water distribution nozzles where homeowners rarely look, a build-up pattern consistent with the household mold risks outlined in Dubai Municipality’s indoor air quality guidance.
Locate the release tab usually situated directly above the fabric softener compartment, depress it firmly, and pull the entire drawer assembly out of the chassis. Disassemble any removable siphon inserts or flow caps, then submerge all components in a basin of hot water mixed with a splash of liquid dish soap or white vinegar for fifteen to twenty minutes to soften hardened chemical crust. Use a narrow, stiff bristled brush to thoroughly scrub every channel, corner, and underside crevice until the plastic is spotless. Before reinstalling the drawer, take a damp cloth wrapped around an old toothbrush or bottle brush and scrub the dark interior cavity inside the machine frame. Focus on the ceiling of the compartment to clear the water spray jets of mold and mineral buildup, wipe the cavity dry, and snap the clean drawer back into position. Decomposing chemical sludge inside this housing is one of the main causes of foul laundry odors read our full guide on why a washing machine smells in Dubai to clear hidden odor traps across your machine.
Step 3: Run a Full Drum Cleaning Cycle
Time: 1-2 hours, depending on the cycle
With the machine empty, add either a washing machine cleaner product or two cups of white vinegar directly into the drum, then run the hottest, longest cycle the machine offers. This clears mold and residue from inside the drum and the internal components a manual wipe can’t reach.
Using a Commercial Cleaner:Follow the product’s specific instructions for dosage. In Dubai’s mineral-dense water environment, cleaners containing active descaling agents are essential because rough limescale crust gives fungal spores an ideal surface to cling to.
To understand how mineral deposits degrade internal mechanics, check our guide on how hard water damages your washing machine in Dubai.
If Using Vinegar: Two cups poured directly into the empty drum before starting the cycle is generally sufficient. For machines with a dedicated cleaning cycle setting, use that specifically rather than a standard wash cycle, since cleaning cycles typically run hotter and longer.
Using Baking Soda as a Booster: Adding half a cup of baking soda to the drum alongside the vinegar creates a mild fizzing reaction that can help lift ingrained residue, though this step is optional rather than essential.
Step 4: Check and Clean the Drain Filter
Time: 10 minutes
Locate the drain filter, usually behind a small panel at the bottom front of the machine, and place a shallow tray underneath before opening it, since some water typically drains out. Clear any trapped lint, hair, or debris, which often carries its own mold growth separate from what’s in the drum or seal. Rinse the filter itself under running water before reinserting it, checking that it clicks or screws back into place securely.
Step 5: Dry and Air Out the Machine Completely
Time: A few hours, passive
Once all four steps above are done, leave the door and detergent drawer both open for at least a few hours, ideally overnight, so every part that was just cleaned dries out fully rather than trapping fresh moisture right after cleaning. This final step is often skipped, but it’s genuinely as important as the cleaning itself, cleaning mold away and then immediately closing the door again undoes much of the benefit
Dealing With Stubborn or Recurring Mold
If mold returns within just a week or two of a thorough clean, despite following every step above, a few things are worth checking before assuming the cleaning process itself failed. Persistent hard water mineral buildup, covered in full in the hard water damage guide, can create extra surface texture that gives mold more to cling to even after cleaning, making descaling as important as mold removal itself in these cases.A door seal that’s developed deep, permanent staining or degradation after prolonged mold exposure may need professional inspection through a washing machine repair service, since seal material that’s been compromised can be difficult to fully clean regardless of the product used . In these more stubborn cases, diluted bleach, used carefully and with good ventilation, can address mold that vinegar and commercial cleaners haven’t fully cleared, though this should be an occasional measure rather than a regular routine.
How Often to Repeat This Process
A full clean like this is worth doing once a month for regular use, or every two to three weeks for households with heavy daily use or particularly hard water, since mineral buildup gives mold more surface area to grow on. Between full cleans, wiping the door seal dry after each wash and leaving the door open between loads prevents most regrowth on its own, and takes only a few seconds each time compared to the full process above.
FAQs
Can mold in a washing machine actually make clothes dirty again after washing?
Yes. Mold spores inside the drum or seal can transfer onto clean laundry during the wash cycle, which is part of why clothes sometimes smell musty even right after washing.
Is vinegar or bleach better for removing washing machine mold?
Vinegar is safe for regular use and effective for most mold and mildew. Bleach can be used occasionally for stubborn buildup but shouldn’t be a regular routine, and the two should never be mixed together.
How long does mold take to build up if the door is always kept closed?
It varies, but visible mold can start appearing within just a few weeks of consistently keeping the door closed after washes, especially in humid conditions.
Does a musty smell always mean there’s visible mold too?
Not always. A smell can develop from bacteria and residue before mold becomes visually noticeable, which is why the smell alone is worth acting on rather than waiting for visible growth.
Can mold buildup actually damage the washing machine itself?
Beyond the smell and hygiene concern, heavy mold and mildew buildup can affect seal integrity over time and contribute to the drainage issues covered elsewhere in this guide, so it’s not purely a cosmetic issue.
Why does mold seem worse in Dubai compared to other cleaning advice found online?
Dubai’s combination of high humidity and hard water creates conditions that support mold growth faster than in drier or softer-water climates, which is why the cleaning frequency recommended here is often shorter than generic international advice suggests.